Customers
Indicates the client of this account, who shall be receiving invoice issuance and payment receipt from your account.
How to add customer
-
Go to Customer page
-
Click on

-
Fill in the necessary fields marked (*). Some explanation of the fields are as such:
Field Description Name Customer name Debtor Code a.k.a. Customer Number, is a running number to identity customer with prefix configured and auto-generated number at setting page, see Customer Setting page Email Customer's email address, which will receive invoice and payment receipt for further action Payment Term The conditions under which a vendor completes a sale, eg. 90 Days
also act as default value of payment term when creating invoice -
Click on

Customer Details
-
At Customer page table, click view button


{info}
There are 3 cards, ie:
1. Customer Profile
2. Customer Invoice Aging
3. Customer Invoices
1. Customer Profile
Additional field explanation are as such:
| Field | Description |
|---|---|
| Open Invoices | The quantity of invoices which is not Fully Paid |
| Open Credit | The total amount of money which is overpaid |
| Last Payment At | Date that customer made the latest payment |
| Registered At | Date that this customer is created |
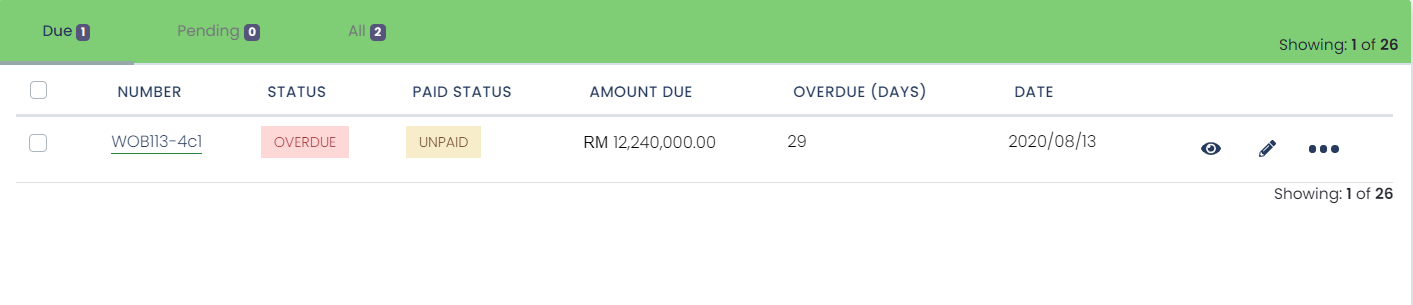
2. Customer Invoice Aging
At here, customer aging is displayed as tiles

{info} You can click the tile to expand more details: The open invoices that belongs to the selected tile
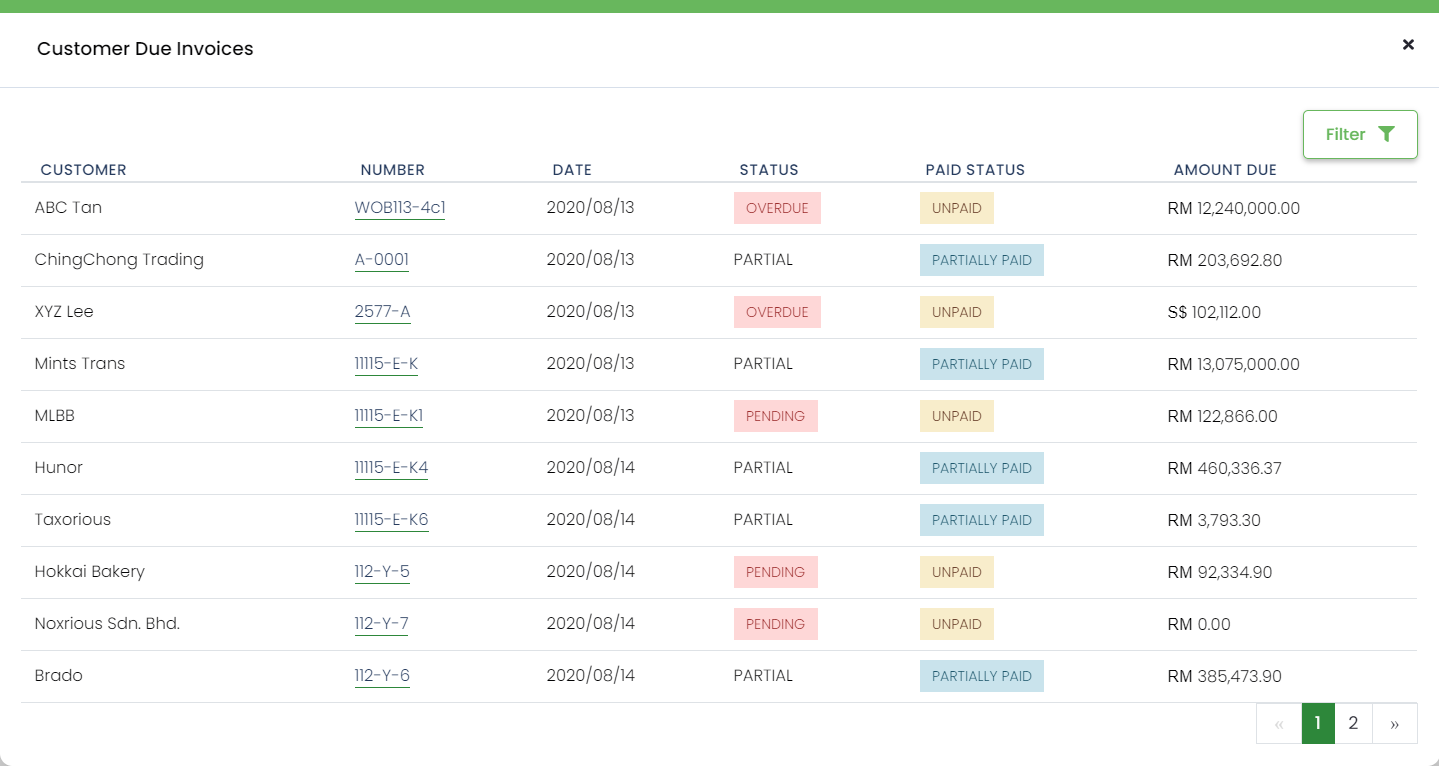
3. Customer Invoices
{info} The same table structure from invoice's screen, but will only show customer's invoices.